Showing posts with label Tips And Tricks. Show all posts

How to Delete Your Facebook Account

Check Here For Video


Watch the 30-second video above, or follow these steps:
1. Click the gear icon in the upper right-hand corner, then Help.
2. Search help for “delete” and click the first entry that pops up.
3. Click the “let us know” link, and then Delete My Account.
If you want to save a backup of your stuff first, follow these steps:
1. Click the gear icon in the upper right-hand corner, then Settings.
2. Under General Account Settings, click the “Download a copy of your Facebook data” link.
3. You’ll get an e-mail in a few minutes, which will direct you to a page where you can download your stuff (photos, videos, posts and more).

How To Get Unlimited Verified Phone Facebook Accounts

How-To-Get-Unlimited-Verified-Phone-Facebook-Accounts (1)
In order to make your applications compatible with leading social network websites, Facebook developers are required to verify their phone numbers at first. Being the leading social networking platform, Facebook has attracted total of 1.3 billion users as per the recent stats and figures of the month May,2014 – So, there are different levels available for the memberships. However, it doesn’t matter whether you are an individual user, any organization or a business-owner – Facebook welcomes people from every walk of life. For the online developers who want to make their own apps with the intent of running it on the Facebook must need to verify their phone numbers before any online app developing work.
What Is PVA?
PVA is generally abbreviated for the “Facebook Verified Accounts”. Basically, this term was created for the online community to understand the value of verified Facebook accounts by the marketers. However, there’s no official Facebook terminology available on the internet under this context.  The companies which basically create and sell these Facebook phone verified account use this terminology for better understanding of the online developers and marketers.
Why You Need Facebook PVA Account? 
As mentioned above, online developers are required to verify their accounts through phone at first before getting into any action because they are no ordinary online users. In a way or the other, they are going to contribute in the best interest of the ordinary online users so they have to be ensured and verified by the Facebook official team. Not only developers, programmers are also categorized in the same niche as far as the account verification through phone is concerned.
With dozens of online threats and security concerns, Facebook is bound to verify the accounts through phone only and there’s no other way around to make it possible. Facebook mobile is yet another appealing and attractive app which is being used for the verification purpose of accounts by the Facebook official team. You can simply link your Facebook account with this app and all the updates, notifications along with announcements will be received directly onto the phone.
PVAs – How It Really Works?
While making your Facebook account – either you are a developer or an online programmer; you will be asked to verify your account by selecting one of the following options:
  • Verify Facebook Account Through Credit Card
  • Verify Facebook Account Through Mobile Number
The easier and convenient way is to verify your Facebook account through phone (PVA). Simply enter the country code + mobile number and click “Confirm Your Phone / Submit” button. After which, you’ll be sent a code to your mobile phone which you have to enter to your Web Facebook Account for the verification task to get completed.
Confrim you number
Security Threats & Relative Concerns:
It is very important to keep in mind that only a single account can be verified against a single mobile phone number. Therefore, if you intend to verify multiple Facebook account over a single phone number – this will certainly result vain.  As far as 1 account per phone number is concerned, it is quite justifiable because with so much rush of online spammers, hackers and other cyber activists – Facebook is determined and committed to stop every unethical way of verifying multiple accounts through single phone number.
Another appealing and attractive benefit of verifying your Facebook account through phone number is that its security will then never be compromised. Even in case of any hacking activity, you can regain your original Facebook account by mobile phone text verification.  Now, this activity from Facebook officials is pretty much appreciable since it has been observed very much effective to drive-off spammers and hackers in recent years.
For more information regarding the verification procedure of the Facebook account, you are requested to submit online request to the officials at Facebook. They will surely entertain your request at the earliest possible moment.

How To Create Unlimited Facebook PVAs:


Following are the important factors that you need to have in order to create Unlimited Facebook phone verified accounts:
  1. US IP / Proxy
  2. Email Accounts
  3. Fake Images & Identities
  4. Virtual Mobile Phone Numbers
And at the top of all, Patience / Time & Brain.
Let’s Start
  1. Download and Install
    1. VPN-CyberGhost (SOFTWARE)http://www.cyberghostvpn.com/en_us
OR
  1. Astrill (SOFTWARE) https://www.astrill.com/
OR
  1. ZenMate (BROWSER)(CHROME & FIREFOX) https://zenmate.com/
OR
  1. Hola (BROWSER) (CHROME & FIREFOX) https://hola.org/
OR
  1. Or use any US Proxy http://proxylist.hidemyass.com/http://www.gatherproxy.com/
  1. Get some fake details from any of the given links:
    1. http://www.fakenamegenerator.com/
    2. http://www.datafakegenerator.com/generador.php
    3. https://fakena.me/
  2. Register yourself at Yahoo Email!
    1. https://edit.yahoo.com/registration
      1. Use Yahoo Registration only as it doesn’t ask for the phone verification
      2. Even if it asks, you can tackle it with the virtual phone number
  • 5-10 Yahoo email accounts per day are enough to register
Yahoo Sign Up
  1. Now log onto Facebook and register the accounts with given Email Yahoo registered accounts.
    1. http://m.facebook.com/
  2. Once the above mentioned 4 steps are followed in the righteous manner – Now is the time for Mobile Phone Verification for the Facebook accounts
  3. Click on the given link for the virtual phone number registration
    1. http://www.phone.com/
      1. You can change as well as addition upto 3 numbers is allowed against a single account.
      2. That means – each account has got 3 numbers against which you can verify 3 Facebook accounts.

7 . Enter your virtual mobile number & click “Give me a call” as shown in the figure below:
Please Complete A Secuityu Check
  1. Now wait and let the magic does its trick – you’ll soon receive an SMS of code activation on Phone.com – as shown in the figure below:
Yahoo Inbox
  1. You will also receive the same activation code in your registered yahoo email also. So, there’s no need to worry even if you don’t receive it at Phone.com
  2. Get back to Facebook – logon with your recently created account – verify it using the given method & bingo !!!!
Notice: You can repeat the above given steps as much times as you want for the unlimited creation of verified Phone Facebook accounts. However, don’t forget to change your IP at the beginning of the process

How to Approved By Google AdSense In just Tow Hours?


How to Approved By Google AdSense  In just Tow Hours?

Its very easy just click here and open this link and follow these steps , and i hope so you will get account in tow hours, and make money as much you can , so enjoy if you have any problem tel me here i will solve ...

Check Here In Link

 Link

HOW TO GET USA NUMBER Free Verify PAYPAL ACCOUNT

HOW TO GET USA NUMBER Free Verify PAYPAL ACCOUNT

You can use it for Google, Facebook,Paypal type accounts and have been verifying them

Sign up as a developer and you can test your applications free – thrown into this you get access to a free pool of US numbers that can receive SMS messages.


You can assign numbers, use it to verify & then un assign and make a new number again ..

If you use a again and again and agian may be they will ban you or ask for pay so dnt do like this

.

For Link Reply the POST And Then RE-FResh<<<YOu Must Register Your Account

How To Run iOS Applications On Your PC/Computer With iPadian iPad Simulator


If you can't afford a iPhone,iPad or any other device where we can run iOS application but you want to use some iOS applications and you have PC than i have small solution for this problem iPadian.iPadian is a software which gives you a custom iOS app store where you can search your favorites iOS app  download and Run it to PC.It is a lite and easy to use Software for PC users.It supports almost all operating systems like Linux,Mac &Windows.iPadian is not a emulator you can't run .ipa apps downloaded from iTunes but you can download and install and run same apps like iTunes apps available in iPadian custom app store.iPadian daily add many apps to there custom app store according to user requests.It is first and unique software ever which allows you to run iOS apps free of cost.The only disadvantage of this software is that it can't run application downloaded from iTunes [Apple App Store].

Requirements To Install iPadian In Your Windows PC 

  • Windows XP/Vista/7/8 Operating System.
  • Atleast 50MB Disk Space.
  • 512 MB RAM.
  • 2.8 GHz Pentium Processor.
  • Adobe AIR should installed on your PC.

How To Run iOS Apps On Your PC With iPadian 


  • Now Click on skip or Next Button.
  • Wait till it downloads compleatlly that's it now you can run iPadian , Download iOS softwares available in their custom app store and run them.
Hope above will helps you in Running iOS Applications easily in your PC/Computer.Share your problems and ideas below in comments.Thankx keep visiting..... 

Get Free Domain Name For Lifetime With Full DNS Management


First thing that we need to create website or blog on internet is domain name.We can easily buy top level domain names from godaddy,namecheap,bigrock etc. domain seller websites.It costs only 10$-15$ per year for a .com domain.But still some newbies don't want to invest that much money for a domain name.So, they start blogging with blogspot sub-domain.We never recommend anyone to use blogspot sub-domain.Because google can delete your blog anytime and once your blog is deleted by google, you can't get back your sub-domain and also we can't use that sub-domain in own webhosting.So, today we are going to share 5 best sites who provides free domain name for lifetime with full DNS management.


5 Best Sites Who Provide Free Domain Name For Lifetime With Full DNS Management :

#1 CZ.CC Free Domain Name :


CZ.CC is one of the most famous free domain provider.You can register unlimited domain with CZ.CC free of cost.It gives you full DNS support with domain name.You have to create a free account there to register your own domain name.You can also register uni.me,mac2.org,oapg.org,11r.biz,11r.us,3vt.info,wsse.us,co7.us,b3g.biz,avli.biz,iilg.biz,vqtel.net and many more extensions domain on CZ.CC.Register your free domain with CZ.CC.

#2 Dot.Tk Free Domain Name :

 
Dot.tk is the leading free domain provider with DNS support.Dot tk domain looks like a paid domain because it is very short.Dot tk domain has the same power as other paid domains.Dot tk providing free domain name since 2001.We can easily add or modify CNAME,A,AA records of dot tk domain.We can also use .tk domain with own webhosting or we can also host it with Dot tk.Register your free .tk domain name on dot.tk.

#3 CO.NR Free Domain Name :

 
CO.NR is a great free domain provider who provides very short extension domain name with no ads.Domain registered with CO.NR comes with many premium services like URL redirection,URL cloaking,path forwarding,custom favicon support,full DNS management and much more.Register your free domain name on CO.NR.

#4 SMARTDOTS Free Domain Provider :

  
On smartdots you can register free .xx.xx extension domain name for lifetime.Smartdots provide premium services with domain name like unlimited e-mail accounts,DNS support,free webspace,access protection,FTP login,custom favicon and much more.Register your free domain on smartdots.

#5 CU.CC Free Domain Name :

 
It is the one of the most trusted free domain provider with premium features.You can register up to 100 domain names with cu.cc for free.CU.CC provides free DNS service with full MX,CNAME,A and SOA records.CU.CC also have affiliates program for its users.Register your free domain with cu.cc.


These are most famous sites to register free domain names.Free domain names are mostly used for testing purpose.If your a serious blogger, we recommend you top level domain names like .com,.net,.in etc.And if you want to go with free domain name than .tk and cu.cc are best free domain providers.Please leave your feedbacks and suggestions below in comments.And don't forget to socialize this article with your friends.

How To Post In Multiple Facebook Groups In One Click

Everyone knows that facebook is one of best place for all the bloggers to promote or share their blog posts.If you share posts on your facebook timeline or wall than very few peoples saw your posts.In this case, facebook groups can drive more traffic to your posts.So, first we need to join lots of groups and post our blog posts there.But it takes too much time to post all groups one by one.We are also facing the same problem before.Now we got a solution of it and today we will share a great trick to post all facebook groups in only one click.

How To Post In Multiple Facebook Groups In Single Click :

  • First of all you need to join lots of facebook groups related to your blog niche.After joining wait for admin approvel to become a member of group.  
  • After geting approvel from groups admin we have to collect the facebook e-mail addresses of joined facebook groups.
  • Some groups prvide their facebook e-mail address in their group info.Otherwise we have to find the username of the group.We can easily get the username of facebook groups by opening them into our browser.After opening groups you can see group address on our browser address bar.It will something like below link.
v

  https://www.facebook.com/groups/UserName


  • Copy the username of the  facebook group and paste them into notepad or wordpad.
  • Now its time create facebook groups e-mail address from their usernames.We just need to paste the username just before @groups.facebook.com.Now facebook groups e-mail address look like below e-mail address.
 UserName@groups.facebook.com
  • Use above steps to create e-mail address for all joined groups and don't forget to seperate them with commas.After creating e-mail addresses for all groups save them into notepad,wordpad,MS Word etc.
  • Now sign in your e-mail address which you have used to create acount on facebook.
  • Than click on compose e-mail option.
  • Now copy all facebook groups e-mails and paste them into BCC field.
  • Now compose compose you mail with text,links and images that you want to post.And click on send button.
  • That's it.Now check facebook groups, your message is successfully posted in all groups.
Note : You can't post on unjoined groups and please don't spam in groups.You may got banned for spamming in groups by group owners.
You have follow above steps again to post again on all groups.Above trick will save your lots of time and you also get decent traffic from facebook.We hope you like above post.If you are facing any problem please share it with us below in comments, we will try to solve this.

How You Can Able to Manage All Social Networking & IM Accounts At One Place???

As we're growing in the fast-moving world, quick communication between people is the main concern to keep yourself connected with friends and business contacts in really cheap. On the Internet Instant Messaging Services allow us to send/receive messages in real-time. Since almost all of these services are free that's why there so much demand, however there are lots of choices available to you like Google Talk, MSN, Yahoo, AOL, and especially Skype (which is widely high quality for voice communication between people).


It’s fact that most internet users use more than one IM Service and Social Networking site.-


1) Most Internet Users Use More than One Social Networking Site and IM Service

Its fact that most internet users use more than one IM service. To use their services you to use their website or install their IM clients for each of the IM services. Social networking sites like Facebook, Twitter, where people have to sign in to their website to keep connect and message their friends. So, it would be a headache for you to keep in contact with them if your one friend uses Facebook for IM, and other use Google talk / Yahoo, etc. Thus, Having an account on all major Social and IM website is a good solution, but managing all of them individually is another headache is much time consuming, and it can make you less productive.

Final Image


2) Manage Multiple Social Networking / Instant Messengers Accounts 


From One App

To fill this gap of organizing all major ways of online communication multiple Social/IM services at once we have available multiple Social/IM application for your desktop. In which can manage all your accounts at one place. So, you'll keep connected with everyone whether your friend is on Yahoo / Google / MSN / AOL or Facebook / Myspace no problem. You can even use twitter for tweets and keep updated with your timeline, like or comment on Facebook's updates.


Final Image2


3) Multiple Social Networking / Instant Messenger App Ready to Keep You Connected

There are three major applications available that offer us to use and organize multiple Social/IM accounts at once. The applications are:
* Digsby* Trellian Astra* Pidgin
I have used Digsby for about 3 three years and much satisfied with this application, but nowadays it's annoying with "Facebook authentication error' message. At the moment, I am switching to Trellian Astra still I'm much satisfied with it due to it looks and support for Skype's account. I can be easily able to send tweets from my two twitter accounts, one for friends and other for business. So, now it's time for you to start thinking to use multiple Social/IM application to save your time in the future that you consume just for communication.

Three Easy Steps to Run Several Skype Accounts At a Time

Probably you've signed up for a Skype more than once, may be one for your family and friends and other for business clients, etc. So, when you're looking to run Skype program to sign signed in for the 2nd account or so at the same but normally if you just try to run it by going to Programs under Start Menu. You'll can't able to get it run. Today I'm going to show you easily you can run Skype program more than one for other Skype accounts. 

skype-window


I'm supposing that you're using Windows 7. Let's follow the instructions:

STEP ONE: GO TO RUN COMMAND WINDOW
Go to 'Start' Menu > Type 'Run' or simply press 'Windows Key' + 'R' this will open the 'Run' command window.

Note: Whenever you install any program mostly it installs in C:\Program Files or C:\Program Files (x86) I'm assuming your program in install in C:\.


STEP TWO: TYPE THE PROGRAM LOCATION
In the 'Run' command Please type the location like below:

"c:\program files (x86)\Skype\phone\Skype.exe /secondary"


Note: We use '/secondary' so it means Skype program's another instance will run.


STEP THREE: ENTER ACCOUNT DETAILS AND SIGN IN
Now Skype's sign in window will appear just put your accounts detail you're done.


When quitting the one of instance of Skype program then point your mouse cursor to Skype program on the taskbar, you'll able to see the window thumbnails of running Skype programs, just click one of the Skype you want to quit, after that right click on Skype icon on the taskbar then select 'Quit' and then again confirm 'Yes' on the dialog box that will appear next. And this is how you'll close one of Skype program and other will remain open. That's it.
Can Blogger Make a Menu Bar That Categorizes Posts?

Can Blogger Make a Menu Bar That Categorizes Posts?


One of the biggest problems with Blog spot is the menu bar where you have so i am gonging to solve this hope you like. In WordPress, you can easily and quickly create drop down menus. In order to make that work in Blogger, you need to modify your code. However, not all is lost. Maybe you can’t have drop down menus without a lot of headache, but you can have categories at the top of your menu bar. You can use your labels as categories. Let’s say for example you write about food, marriage, and fashion. When someone comes to your site, they may only want to browse through the marriage posts. By creating a menu tab with the word marriage, blogger will pull up only those posts. Typically a menu bar is only comprised of static pages or outbound links. However, using a simple formula, you can create your labels to work as menu bar items!
If you haven’t created labels yet, you should. Labels are like extra keywords that attach to your post, but if you want to use the labels to help categorize your posts, pick about five or six labels and always use the same label when you are adding it to a post.

Once all your posts are labeled, here’s how to make the menu bar.
01. Login to your Blogspot dashboard.
02. Go to layout.
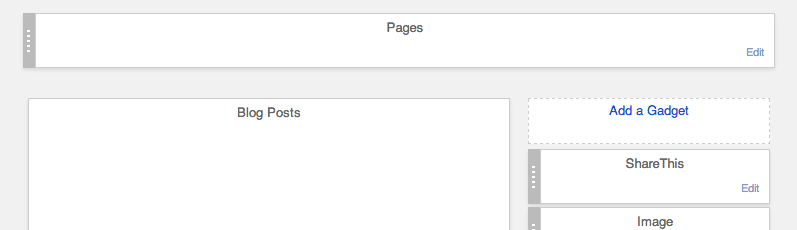
03. Click on your menu bar widget (it’s probably labeled pages) to open it up.

Screen Shot 2014-05-14 at 1.00.19 PM
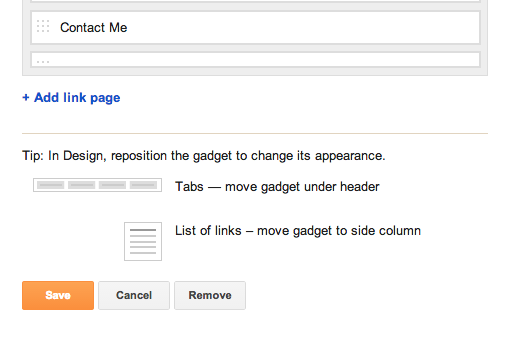
04. Go to the bottom where it says ADD LINK PAGE.
Screen Shot 2014-05-14 at 12.53.07 PM
05. Type in the title as you want it to appear (in our example, type the word Marriage).
06. Now you need to type in a URL. http://www .[your blog name].com/search/label/[your label]
07. Hit save. after giving URL
You are all set! Any blog post that uses that label will be pulled up like a filtered archive  (listed according to date).

How to Receive Payments from Adsense with Payoneer

How to Receive Payments from Adsense with Payoneer


How to Receive Payments from Adsense with Payoneer

 Adsense is, to date, the best alternative to make money with our sites or blogs via contextual advertising. Theadsense payment system gives the option to receive monthly income through bank transfer, Western Union or by sending checks. In this resource I want to share, we will use the first option "Bank Transfer".

Thanks to a new option to receive payments through affiliates is to service Payoneer (know that payoneer you pay $ 25 to apply for your service!), Which allows us to collect money, send it to your bank account in the United States - created for them on your behalf - and withdraw the money to Payoneer prepaid MasterCard card.

One of the restrictions Adsense payment system is not for all countries and allowed users to receive payments by bank transfer, but it already has a solution. Careful when applying the method!

The first thing you need is your Payoneer account, even if you can not apply through the official site

The second step is to create a physical address in the USA by registering your account USABox.com . This is the address that we will use in our Adsense account - you should have the choice to change direction -

As Adsense confirms the PIN and the account through a telephone number that you must enter the account, and as we are entering an address USA so we can receive transfer payments , here we will make some investment and we will use Skype service to hire a real phone number within the United States on our behalf . From their website you can buy the phone number.

We headed to our Adsense account and we use data obtained previously and hopefully address the call by the number of Skype to confirm the PIN takes to reach both by regular mail to the Latin countries .

We have everything ready , now just need to wait payments reaching Payoneer account and you can withdraw the card at any ATM Mastercard for your country!
Get a MasterCard debit card in Pakistan

Get a MasterCard debit card in Pakistan

Get a MasterCard debit card in Pakistan

If you need a MasterCard debit card to make any online purchase or to enjoy low transaction fees, the Payoneer MasterCard debit card is your best choice. Most banks in Pakistan offer Visa debit cards, so getting a MasterCard here is quite difficult.

Luckily, Payoneer now allows users to obtain cards though its website without any partners. If applicants request the card through an affiliate, not only is their application expedited, but they also get $25 FREE once they load their card with $100. Best of all, users who apply for their card from the below link can enjoy NO MONTHLY FEES and they just have to pay an annual fee of $29.95 (only if your card has a balance - it will never go into negative). There are NO ACTIVATION FEES if you register through the link below. You can use the Payoneer MasterCard debit card to get a BANK ACCOUNT IN AMERICA. This can be used to verify a Paypal account and USE PAYPAL IN PAKISTAN!

Click here to apply for a Payoneer card and get $25 absolutely free as soon as $100 is loaded onto your card

OR

Leave your email address in the comments section and I'll send you a personal invitation. 

With a Payoneer MasterCard debit card, you can receive payments from clients all over the world through load.payoneer.com . You can also load your card using any Pakistani credit card or debit card, and then use the card to make purchase transactions all over the world.

The fee schedule for the card is as follows:

Annual card account maintenance $29.95 Per Card From available card balance each year
Card replacement $12.95 Per card One time - when issuing a replacement card
ATM Cash Withdrawals or Transactions ATM withdrawal $3.15 Per Trx When withdrawal is requested
Declined ATM withdrawal $1.00Per Trx When withdrawal request is declined
Purchase Transaction Free *Per Trx When card is used for purchases
ATM Balance inquiry** $1.00 Per Trx When inquiry is made

* When a transaction is made as a foreign transaction or is requested in a currency other than USD, charges of up to 3% may be assessed above all charges assessed by MasterCard for the transaction.
** Not available in Pakistan. Balance can be checked on the internet by logging into your account on www.payoneer.com


Any questions and queries are welcome. I strongly recommend you order the Payoneer card as soon as possible as there are no activation fees currently. I have been using Payoneer for over two years now and they are very safe and reliable. You can hook this card onto any Payoneer partner or use privately too.